Thursday, January 31, 2013

Dia de la Abby: #81 Skull Baby Quilt

This quilt, like the Skull Baby Toy that my daughter made, is for Noah and his wife's soon to be born baby.


Ever since I made this Free-form Embroidery Skull, I've been enjoying playing with this technique whenever it fits the project. This is the largest baby quilt that I've made. If you are familiar with my artwork, you might recognize this type of image...a skull with many flowers. It's Dia de los Muertos inspired. Since the gender of the baby won't be revealed until it's born, I tried to tone down the design. Though this quilt is for the blanket, Noah immediately said he might use it more. For scale of the quilt, Noah is holding it up in the photo. It's about a yard of fabric. It's backed with this Dia de los Muertos printed fabric by Alexander Henry. This quilt took about 12 hrs to make. Well worth the time. I'm looking forward to meet the little baby the quilt is for.


On Thursdays in the 6.0 year, I will post my own Dia de la Abby creations. On Thursdays in the 4.0 and 5.0 years, I posted my Dia de la Abby creations and occasionally tutorials with instructions on how I made my pieces. Hopefully you feel inspired by my posts just as I was by Noah's Skull-A-Day 1.0 daily project. Want to find me elsewhere, follow me on Facebookmy BlogGoogle+ and/or Twitter.

Skull Baby Toy

This skull toy is a gift made for a special baby by Alex Davis. You might recognize who is holding it, as Noah Scalin.


You may or may not know, that Noah and his wife are expecting a baby in a few months. Of course that means that the baby gets gifts that their parents would like too. While I was busy making something (which you will see later today), my daughter was busy making a skull toy for the baby. This was totally her idea. She wanted to contribute to the baby gifts. She raided my fleece fabric stash (which exists to make baby gifts) to make the toy. She made the pattern, cut everything out, and stitched the face on. For baby safety, I stitched around the perimeter of the skull with my sewing machine, stuffed it, and closed it. I also re-enforced Alex's stitching on the teeth. She loves making toys and this is her best one yet.


Have you made an awesome piece of skull art? If so, submit it to us! We love see what you all create, and might post it on our website. Details on what we need for a submission can be found here

Wednesday, January 30, 2013

31 Day Nail Challenge - Day 3: Yellow

I'm not overly excited about this look. I don't have too many yellows and the ones that I do have I just wasn't feeling them tonight. My new Cameo Colour Lacquer polishes came in today, one of the colors being this buttery/butterscotch looking polish called "Everything's Dancing". I was a little bummed that it was so difficult to get the chunkier copper glitter out, but this still works.
I am terrible at keeping a solid color on lately. This has nothing to do with disliking how it looks by itself, I just feel like I haven't been creative when I don't do a little something extra. For this, I ended up adding Zoya's Jacqueline and some fun dragonfly stamps. I'm so frustrated with how the stamps photographed though! They are very subtle so I know that is why, but I wish I could show them as they are in person! Ah well ;)

Happy Polishing! :)

A England Tristam & Saint George.

To say these polishes are gorgeous would be the understatement of the week...no year...actually century?

I patiently waited for these polishes to arrive from A England's Thank You promotion and had a few stressful days in there where I thought I wasn't going to get these beauties at all. Apparently, Royal Mail (England's postal service) made a change a few days ago stating they they would no longer allow international shipping of nail polish...because it's a fire hazard to the plane. Erm, I'm pretty positive I've brought polish into my carry on as well as countless other women (or men) who had nail polish in their luggage. Seems a bit ridiculous to me, but oh well. Anyway, A England informed all of their customers of this change several days ago and I was fearful that my polishes were going to be stuck or destroyed until yesterday afternoon when they were happily waiting in my mailbox after their tumultuous journey! 

Up first is Tristam, a holographic midnight blue that makes me swoon. It's so incredible! 
Then we have Saint George and holy crap-ola! Are we being serious with these colors?? I can't even believe how stunning this is! Saint George practically leapt out of the bottle and onto my hand, begging to grace my nails with it's lovely green holo-ness. The application of this polish is up there with the best. Opaqueness after ONE coat! I did two, just for good measure and to add a bit more depth, but it would've have been perfectly alright without it. 
 These are the very first A England's that I've used and I couldn't be happier with them! Amazing quality and the customer service with the whole Royal Mail debacle was excellent. So happy to own these beauties! 

Happy Polishing :)


[BONUS] Skulledelic In-Use: Paul's Boutique

Paul's Boutique in the UK has released a new bag that features my Skulledelic art!


You can get your own HERE.

[CONTEST REMINDER] Win A Skeletube from Noah Scalin

THIS CONTEST IS CLOSED! Thank you for participating.

Don't forget you have until 11:59pm Eastern USA Time on Friday, February 1, 2013 to make an entry comment to win a Skeletube from Noah Scalin. You can find the original contest post by clicking the side bar ad, or this link.


[NOTE: If you are reading this on Facebook or Google+, you must go to THE ACTUAL BLOG POST HERE to enter this contest! You CANNOT enter this contest by commenting on Facebook, Twitter, or Google+]

If you don't win, you can find these hand painted little guys in various models in Noah's Skeletube Shop.

Tuesday, January 29, 2013

"Warrior of Fate"

Like the chief of a demonic tribe this "Warrior Of Fate" commands attention and demands your soul! Todd Holtz used a combination of airbrush and digital art in creating this magnificent beast that would render any mortal man paralyzed with fear.


I almost want to equate this to some sort of Native American/Predator alien kind of collaboration, but I don't think that would be exact, nor do I want to diminish Todd's endeavor to be unique.  I love seeing the dark side skulls come out to the light.  Thanks for sharing yours, Todd!

31 Day Nail Challenge - Day 2: Orange

Knock Knock! Who's there!? Banana!...err Orange. Sorry. 

I surprised myself today by actually keeping up with this 31 Day Nail Challenge. But you might be thinking, "Lindsey, it's only day 2, that's not that difficult to keep on track for yet..." Well, that may be true, but for me that's pretty good! I have such a hard time keeping up with things so I'm happy to report that I have completed my second mani for this challenge within two days! Yay! 

I probably have 2 or 3 true oranges in my collection mixed with several coral and salmon colors so I grabbed all of them and got to work. I was originally going to tape these but went instead for a free hand look. This probably took me about 20 minutes total so not too long and I think it's a fun (albeit, summery) look! :)


I was also invited by Heather at JustLove.ly to join their Mani Monday Link up so I thought I'd give it a go! :) 

Happy Polishing! :)

Monday, January 28, 2013

[CONTEST] Win A Skeletube from Noah Scalin

THIS CONTEST IS CLOSED! Thank you for participating.

Noah Scalin is of course the creator of Skull-A-Day. He's made hundreds of different skulls with various mediums over the years (366 in the 1st year of the project). Last year, Noah combined his love for skeletons and vacuum tubes, to create Skeletubes. He's painted so many of these little guys that he's made a Skeletube army. Since so many people love these fun creations, Noah is giving away one Skeletube to one lucky Skull-A-Day fan!


Occasionally these little guys like to get together and go on adventures. So far they've escaped to a mountain and had a snow day.


PRIZE INFO: One Model B bagged and tagged Skeletube. It is a hand painted skeleton vacuum tube that is packaged as shown.

HOW TO ENTER: Leave a comment below telling us what adventures your skeletube would have if you had one? For example, I might take mine to the beach to dig for lost treasure or to a cemetery to find old friends.

CONTACT INFO: If you win, we need to contact you. With your comment, please INCLUDE YOUR EMAIL ADDRESS!!! Entries are only valid with this information.

WHERE TO ENTER: All entries must be made on this blog post, on Skull-A-Day.com. You CANNOT enter this contest by commenting on Facebook, Twitter, or Google+.

CONTEST CLOSES: 11:59:59 PM Eastern USA Time Friday, February 1, 2012.

NUMBER OF WINNERS: One

PRIZE SHIPS: This contest is open to all skull lovers around the world.

IF YOU DON'T WIN: Don't fret. These hand painted little guys are available in various models in Noah's Skeletube Shop.

[BONUS] 407. Skeleton Damask

I was recently offered a chance to create a temporary mural installation in the Loo Gallery at the wonderful Lamplighter Roasting Company here in Richmond, Virginia.


The Loo Gallery is actually their bathroom and each installation is painted over when the next artist creates their piece!


I decided to create a new wallpaper damask style pattern using only the bones of the human skeleton. I had previously created a smaller wallpaper pattern as part of my original Skull-A-Day project, but I had never done something so complex.


Since the end result was so large and complicated it required two 18" x 24" stencils to create one complete section of the pattern.


I had my friends at BIG SECRET laser cut two sets of the stencils out of thick, flexible mylar and I worked with them in rotation, since they would quickly start dripping from the layers and layers of metallic spray paint I was putting on them.


The installation took three days – or rather nights, since I was coming in after hours to give the toxic fumes a chance to air our before customers would arrive in the morning – to complete. Of course I wore a Bane-style ventilation mask the entire time so that I wasn't breathing in the fumes either...


The piece will be up for the next month or so, so if you're in the Richmond, Virginia area please stop by Lamplighter and check it out in person!

And who knows, maybe this will get turned into actual wallpaper one day, like my Ornamental Skull wallpaper at Designer Wall Coverings & Fabrics.


Thoughts to Brighten Your Day

A little something to think about that may brighten your day.

What's the best compliment you've ever received?

Think about it - relive it - enjoy its truth.

You can share or keep it to yourself - but take some time today and remember the good things.


Two of my top compliments I can think of at the moment:

"Your voice is so unique. I could listen to it forever without getting tired of it."

"You've always been a bad ass motherfucker! ... like a fucking Jedi."


Pics totally not mine.

Sunday, January 27, 2013

31 Day Nail Challenge - Day 1: Red

I'm thinking that this 31 Day Nail Challenge will be good for me as it will actually force me to push myself a bit and not just stick to my favorite colors and designs. There are also a few things on the list that I have yet to try (a majority of the "patterns" sections I have not attempted yet) so I'm excited to learn some new techniques and see what I'm capable of :)

First up for this challenge is Red Nails! Well, red isn't really my go to color, at least not anymore. I used to wear a lot of red (as in, I only really owned red and pink polishes...I had no idea what I was missing!!) but lately I've been wearing cooler tones instead. When my collection first expanded a few months ago, I got rid of a lot of my old polishes that were no longer useable or no longer my taste. For instance, for whatever reason I was REALLY into shimmer polishes for what appears to be several years since that is the only kind of polish I bought. Now a days I tend to stay away from those if I can. I'm not sure what I was thinking in buying all of those, but then again, I had some weird bangs when I was younger and I'm not sure what I was thinking then either (why, mother, why would you let me do that!?) Funny how tastes change that way!

Okay, that was an odd tangent. Here are my Red Nails! It turned into a sort of basket weave/brick wall sort of look. Oddly enough, I actually liked how these looked more without a top coat on because each stroke I had made with the brush was much more defined. 
 Happy Polishing!! :)


31 Day Nail Challenge

Okay, so I used to have this challenge listed in my tabs, but I completely failed at ever doing anything off of this challenge list. I've decided to go for it again, though instead of completing one mani a day, I'm probably going to take my good sweet time completing these. Anyway, here is the challenge list!
Happy Polishing :)

Sunday Simulacra - Version 6.35

Rachel LeCount said "The picture is actually a combination of hand and nose smudges on our patio window with the vertical blinds and red sign in the background that framed the skull." What a wonderful combo that is!


If you are having trouble making it out in the large image above, look at this small image. It condenses what you are seeing, so the skull pops out better.


Keep sending those pictures in, we always love seeing what our skull hunters find. Anyone is welcomed to participate, it's fun and it's easy- if you see a simulacra skull, photograph it and send those pictures in to our submissions address with a little something about what it is really and maybe a little about you.

Space Pirates!

When I'm not making skulls I'm working on a my music/art project League of Space Pirates (whose logo is of course a digitized skull & crossbones) and I thought you might like to know about a few exciting things we have in the works...

We have a new vinyl record coming out in March with an accompanying comic book! It can be pre-ordered now HERE.


We have a brand new music video:


And we're playing a show on February 17th at Gallery 5 in Richmond, VA. More details HERE.

Become a friend of League of Space Pirates on Facebook to keep up with the latest news!

Stained Glass Tutorial

In this tutorial, I will walk you through the steps to creating a stain glass style design. This isn't an overly complex design, but you will need a few items in order to make the process go by smoothly (and to reduce the possibility of you wanting to pull your hair out by the end of it!). That being said, it's possible there is a simpler method out there for completing this look...This is just the way I went about things :)
You will need:
--Base/top coat
--Several different colored polishes (I used 7, but this is entirely up to you)
--A black polish, for outlining each color. I used a black nail art pen with a thin brush
--Acetone/polish remover to clean your brush between colors
--A surface to dab out polish (your palette, if you will)
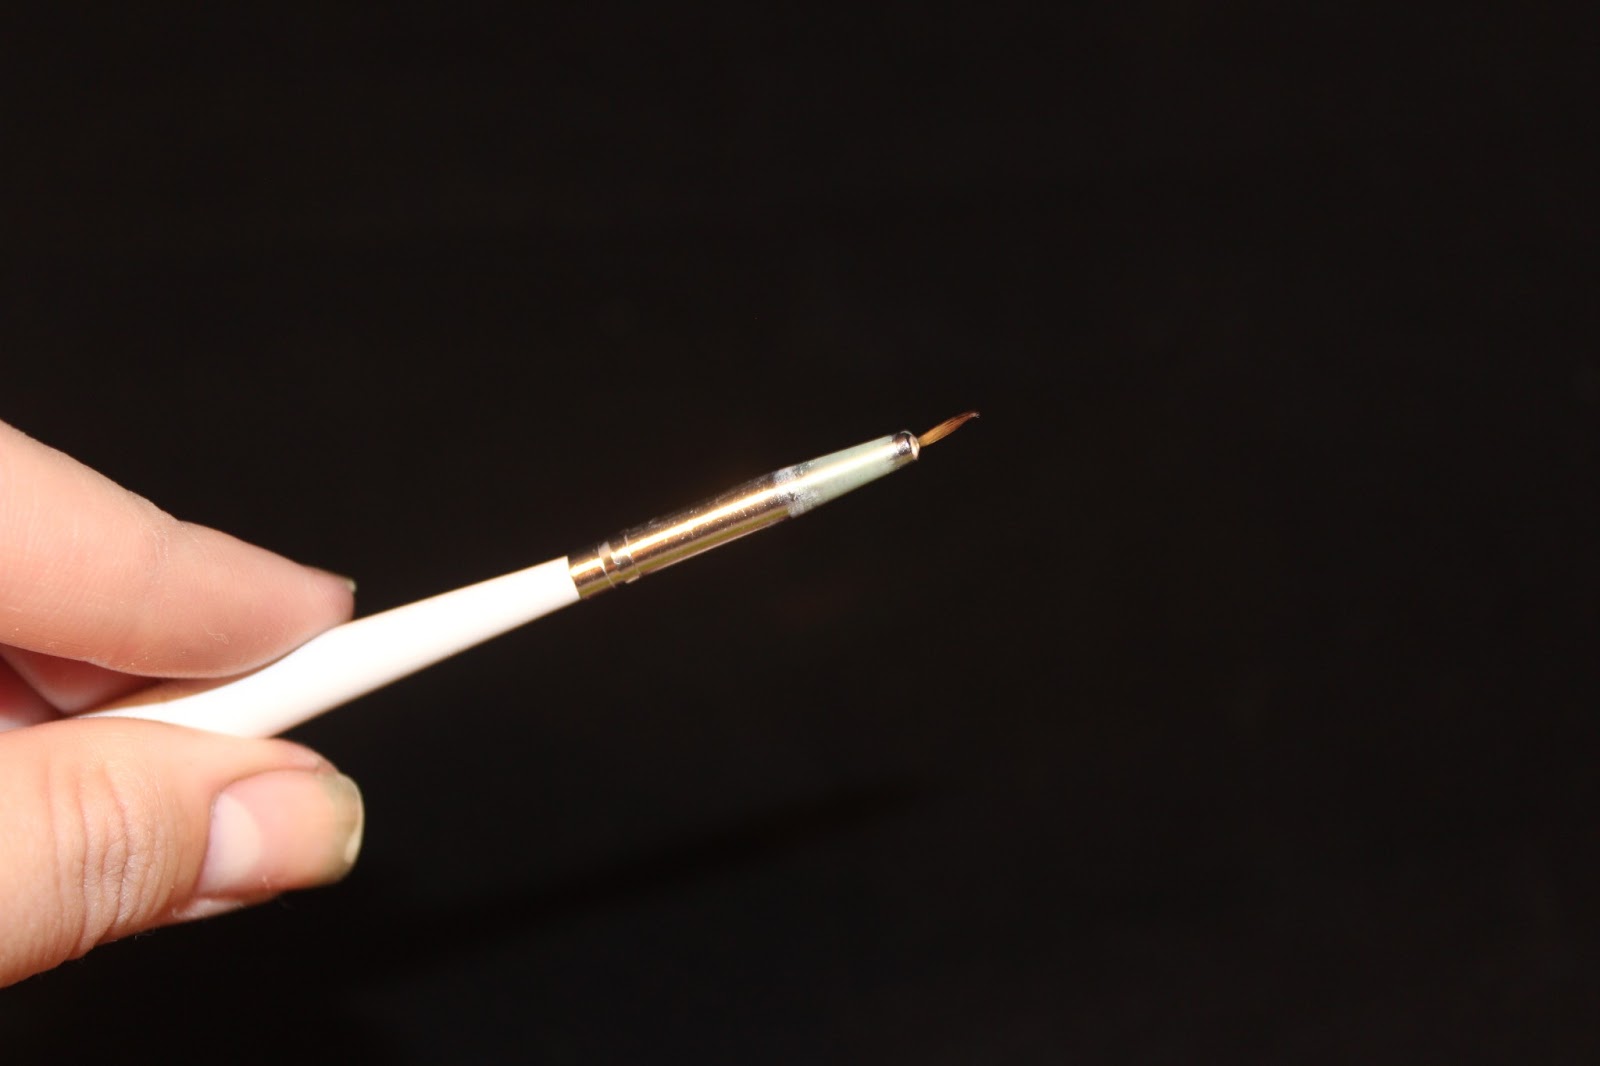
--A small, thin brush used for intricate detail. Below is the brush I used
Apply your favorite base coat (I use OPI's Nail Envy). 
1. Begin creating your pattern using your black polish. 
2. Complete your black outline in anyway you'd like. I ended up repeating the same pattern on all of my nails (once you color in each section, you can't tell that they are the same). Don't worry about how precise or thick your line work is for this step. This is simply a layout for you to color in later. 
3. Dab out some (or all if you're a fast painter) onto your palette and make sure you have some acetone ready for cleaning your brush after each step. 
4. Choose your first color and carefully paint inside one of the sections you created in steps 1 & 2. 
5. Repeat this process using all of your colors. It's up to you how you place these. I decided to mix up each nail and tried to avoid using the same color in the same spot twice. 
6. Depending on how many sections you've created with your black pattern, you may have extra spaces to fill and not enough colors. In this case, you'll have to reuse a few of the colors. Just make sure you don't place the same colors directly next to each other. 
7-8. Once you've filled in all of your colors, your black line work is likely not very clean or defined. Go back over each line carefully with your black and redraw your lines. It's up to you how thick you want them to be. 
9-10. Once you've completed your final line work, wait a few minutes to ensure that your black has dried a sufficient amount and then apply your favorite top coat. If you apply your top coat too soon after steps 7 & 8, you'll end up with black streaks on your colors. 

And that's it! For more pictures of this finished product, check out this post. Let me know if you have any questions! 

Happy Polishing! :)


Saturday, January 26, 2013

Stained Glass Inspired!

This design kept popping up in my head and for whatever reason I kept nudging it away to do something else. I finally gave into it and frankly, I don't know what took me so long to actually do it. This is probably one of my more intricate designs and I am really proud of how they turned out. This whole look probably took me around 2 hours to complete which I know is more than most people want to commit to doing their nails, but I am in love with it. I've been asked to do a tutorial for it and if there is any more interest I'll see if I can put something together.


Someone had mentioned that these sort of looked like turtle shells and I think they do lend themselves a bit to that ;)


Happy Polishing! :)